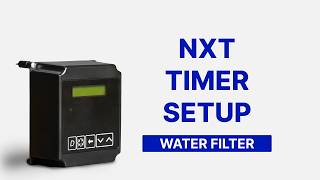
How To Program Your Analog Timer For Your Water Filter
The analog timer is simple and reliable, but only if it is set up properly. This step-by-step guide walks through programming the analog timer on a Crystal Quest control head for a whole house filter, from opening the timer and setting the program wheel to scheduling the backwash time, frequency, and current time.
Why Correct Programming Matters
An analog timer cannot adjust itself. The cycle lengths, backwash time, and frequency are all set by hand. Get them right and the system backwashes overnight and runs efficiently without guesswork. Get them wrong and you can backwash at the wrong time, too often, or not enough. The analog timer is found on Crystal Quest control heads across tanks ranging from 3 cubic feet up to 60 cubic feet.
Step-by-Step
Complete Walkthrough
Power Down and Open the Timer
0:24Before anything else, unplug the control head so you do not accidentally kick the system into a backwash. Open the main face cover to find the analog timer inside. The timer is secured by a hinge on the right side and a spring clip on the top left. Pull on the top-left corner and the timer swings open on its hinge.
Remove and Read the Program Wheel
1:10On the back of the timer you will find a motor, a few buttons, and a programming wheel that tracks the length of each cycle during backwash. Squeeze the two pins in the middle and pull the wheel toward you to remove it. The dial comes preset with a 10-minute backwash, one open space for the brine draw, a 10-minute rapid rinse, one open space for the brine fill, and two pins to stop the cycle.
Adjust Cycle Lengths
1:50To add or remove minutes from any cycle, use a pair of pliers to take a pin from the middle and add it to the cycle you want to lengthen. When you are set, place the wheel back on the control head with the notch facing toward the buttons.
Tip: Each pin position corresponds to cycle time. Add pins to lengthen a phase, leave open spaces where no time is needed.
Set the Backwash Time (24-Hour Wheel)
2:50Turn the timer back to the front to schedule the backwash time. With an electrician screwdriver, spin the front knob without pushing the red button to expose the three screws behind it, and loosen each about a quarter turn to release the paper time plate. With the screws loose, spin the 24-hour wheel until you find the arrow, which marks when the system backwashes, and point it to your chosen time. Crystal Quest recommends around 2:00 a.m. or any overnight time so the system is fresh in the morning. Retighten all three screws without spinning the plate, then turn the knob until it clicks into place.
Tip: Hold the time plate steady while tightening so you do not shift the time you just set.
Set the Backwash Frequency (Day Wheel)
4:30The day wheel at the bottom right sets how many days pass between backwashes. A good starting point is once a week: push out the one tab and the seven tab. Each day the wheel advances, and once it reaches the set number of days (seven, in this example) it sends the control head into its backwash cycle.
Set the Current Time and Power Up
5:30Finally, set the control head to the current time of day. Hold the red button on the front and spin the 24-hour wheel until the indication arrow points to the current time. Once set, plug the control head back in and you are good to go.
Transcript
Read the video transcript
Transcript
Read the video transcript
Hey guys, today I'm going to walk you through setting up your analog timer on your Crystal Quest control head. Let's get to it. Before we start, I just want to mention our analog timer can be found on various different control heads we have that are on our tanks anywhere from 3 cubic feet all the way up to 60 cubic feet. Let's get into programming though.
First, we're going to want to unplug our control head so we don't accidentally kick our system into a backwash. Now that you got your power disconnected from your system, you're going to want to go ahead and open up your main face cover and on the inside is where you're going to find your analog timer. Your analog timer is secured to the control head with a hinge on the right side and a spring clip on the top left.
To open this up, all you're going to have to do is pull on the top left corner and your timer will open on that hinge. On the back of your timer, you're going to find a motor, a few buttons, and a programming wheel. Your programming wheel is what's going to keep track of the length of each cycle during your backwash. To take this off, we're going to squeeze the two pins in the middle and pull it towards you and it will come off of the timer itself.
Our programming wheel keeps track of the length of each cycle during our backwash based on a group of pins or openings. Your program dial comes preset with a 10-minute backwash, one space open for the brine draw, a 10-minute rapid rinse, one space open for the brine fill, and two pins to stop your cycle. But, if you want to add or take away minutes from any of these cycles, all you would have to do is get your pair of pliers and take one of the pins from the middle and add it to the cycle that you want to increase.
Like so. Once you get this set, go ahead and place it back on your control head, making sure the notch is facing towards your buttons. Now that we got our program wheel reinstalled on our timer, we can go ahead and turn it around back to the front where we can schedule what time we want it to backwash and what days we want it to backwash on. All you'll need for this is an electrician screwdriver.
On the front knob, you'll notice that one of the grooves is missing. What we're going to do is spin this knob without pushing on our red button to show the screws behind it. Once you see your first screw, you're going to loosen it just about a quarter turn to let go of the paper it's holding on to. And then you'll find your next screw and do the same thing, loosening it just a quarter turn.
And lastly, there's one more screw we're going to do the same thing, too. Now, with all three screws loose, you should be able to spin your 24-hour wheel without having to push the red button. Now that our wheel is free, let's go ahead and spin our knob around until we find an arrow. This arrow tells us what time our system is going to go through its backwash cycle.
Once you find your arrow in the groove, go ahead and spin your paper so that that arrow is pointing to what time you want your system to backwash at. We recommend about 2:00 a.m. or anytime overnight so that your system is fresh in the morning. Once that arrow's pointing to the time you want, go ahead and retighten those screws.
Just make sure you don't spin that plate while you're spinning your main knob. Once you get all three of your screws tightened, go ahead and make sure that your number plate is secured and turn your knob until it clicks into place. Lastly, we need to set our frequency or how many days in between our backwashes. For that, we're going to look at the bottom right of our timer and we'll see our day wheel.
We usually recommend people to start at about once a week. So, for that, we're going to push out the one and the seven tab. Every day, this wheel will tick up and once it's reached its set amount of days between backwashes, in this case, it's seven, it'll send your control head into its backwash cycle. Lastly, all we have to do is set our control head back to the current time of day. To do this, we're going to hold our red button on the front and then we can spin our 24-hour wheel until our indication arrow is pointing to the current time.
Here, it's about 4:00 p.m. so I'm going to set it to that. All you have to do is plug your control head back in and you should be good to go. If you have any questions, feel free to leave a comment below, call us, or visit our website at crystalquest.com.
Thank you.